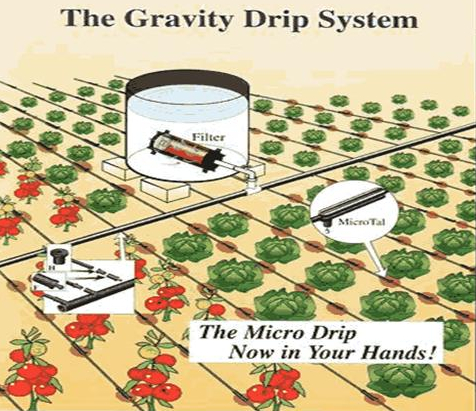
Micro-Tal system

The Micro-Tal system was developed by Ein-Tal Micro Drip Irrigation Ltd. in Israel. It is a gravity system that is adapted to take advantage of the benefits of the drip irrigation method without requiring an expensive water pressure system. The main feature of the Micro-Tal drip system is the low flow rates of 0.1–0.5 l/ h per emitter under low gravity pressure controlled by water heads up to 1 m. The very low flow rate (one-tenth of that of the ordinary drip) means that it takes 6–10 hours to supply the daily amount of irrigation water to a plant through the drip emitter. Another major difference with systems discussed earlier is the drip line, which is assembled by connecting in-line emitters with segments of 4-mm tubing. The gravity filter used in this system is also unique to the Micro-Tal.
Construction, operations and maintenance
System components
- 920-litre drum
- Gravity filter
- Capillary micro-tube with 4 mm outside diameter
- Low flow inline drip emitters
- 16 mm PE pipe
- 16 mm x 4 mm connectors.
Assembly instructions
- Prepare a 60 m x 20 m garden to be irrigated by making planting beds as required.
- Lay out a 16-mm PE pipe along the longer sides of the garden (feeder lines) and every 20 m connect the feeder lines with 16 mm pipe. This makes a network water delivery system that essentially divides the garden into three 20 m x 20 m units.
- Locate the tank at the upper end of the garden. Unroll 20 m lengths of the 4 mm capillary micro-tube along the length of the garden.
- Cut the 4 mm micro-tube according to crop spacing and connect the in-line Micro-Tal drip emitters.
- Connect drip lines to feeder lines with female connectors using the snap-in collar.
- Connect the set to a drum on a platform 0.5–1 m high.
- Connect the gravity filter inside the drum.
Reference manuals, videos, and links
Acknowledgements
- Sijali, Isaya V. DRIP IRRIGATION: Options for smallholder farmers in eastern and southern Africa. RELMA, 2001.
